Plywood Making Process: Step-by-Step Guide from Log to Finished Panel
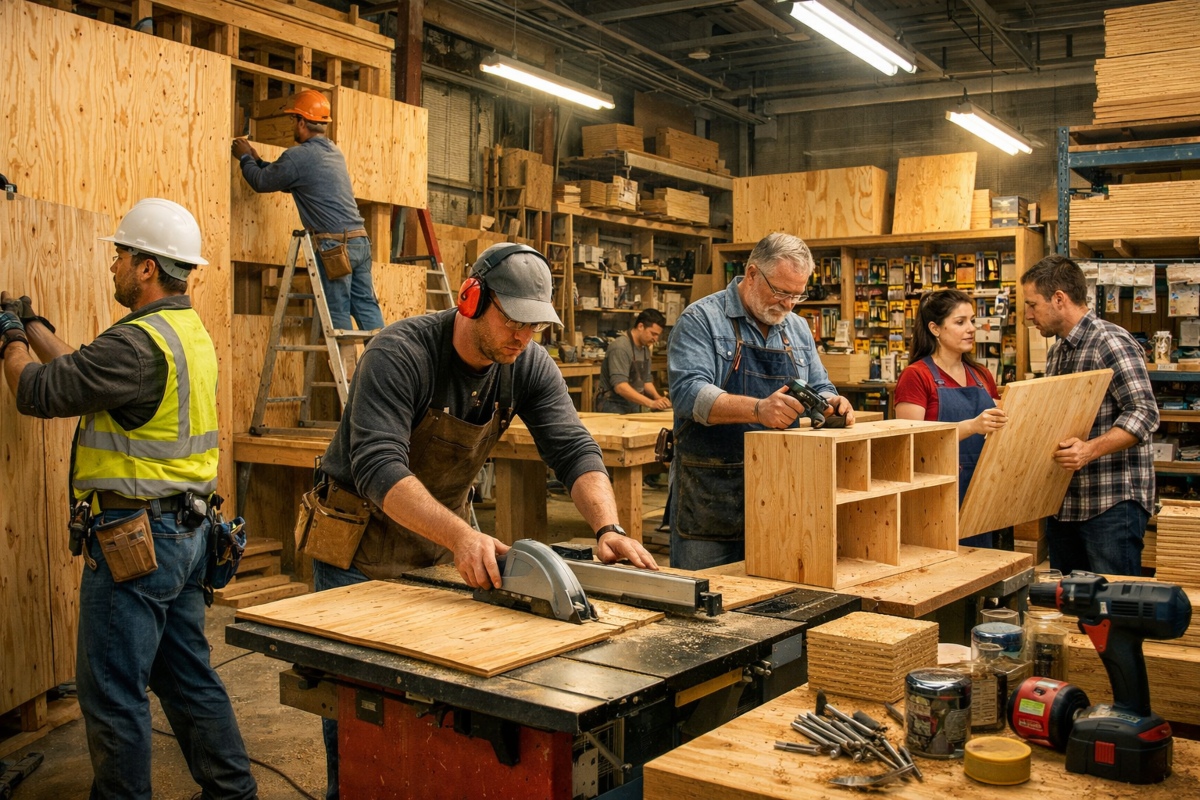
Walk into any construction site, furniture workshop, or hardware store and you will find plywood everywhere. It is one of the most widely used engineered wood products in the world, valued for its strength, dimensional stability, and versatility across hundreds of applications from structural wall sheathing to fine cabinetry. Yet most people who work with plywood every day have never thought about what actually happens inside a plywood factory to transform a raw log into the smooth, layered panel they hold in their hands.
Understanding the plywood making process matters , not just out of curiosity, but because it directly informs better purchasing decisions. Knowing how plywood is made helps you understand why different grades exist, why adhesive type affects moisture performance, and why certified plywood commands a premium over uncertified alternatives.
This article walks through every stage of the plywood manufacturing process in detail: from timber selection and log preparation, through veneer peeling, drying, gluing, pressing, and finishing, to final quality grading and dispatch. Whether you are a contractor, interior designer, furniture maker, or simply a curious DIY enthusiast, this guide gives you a complete picture of how plywood is made.
What Is Plywood? A Quick Overview
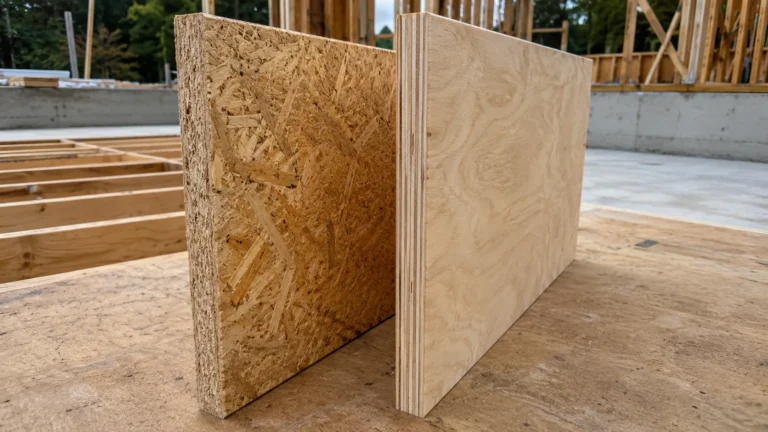
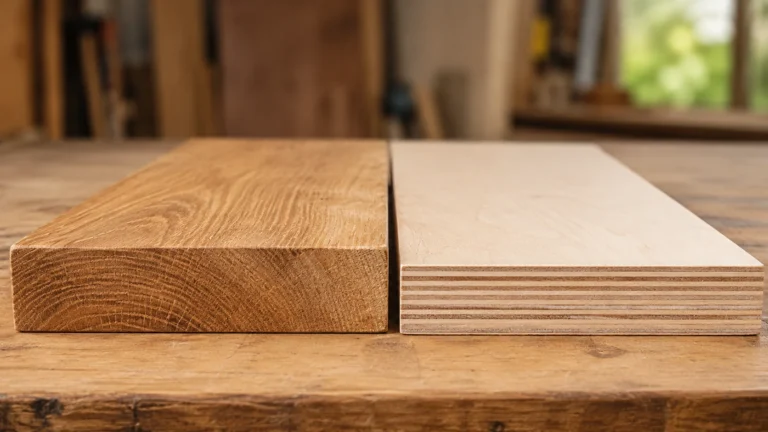
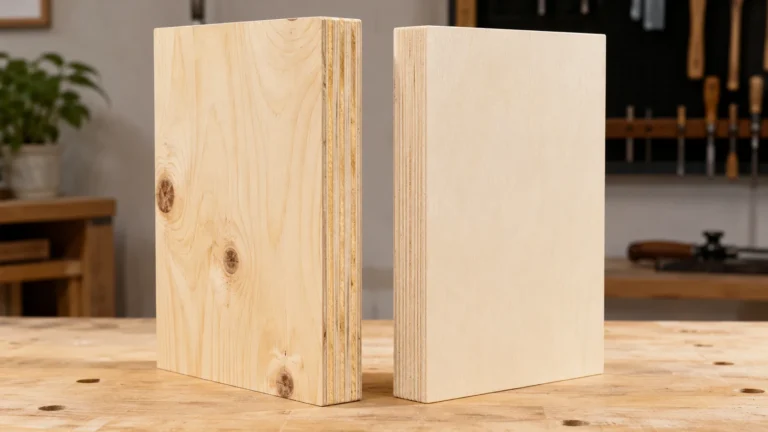
Before diving into the manufacturing steps, it helps to be clear on what plywood actually is. Plywood is an engineered wood panel made by bonding together multiple thin layers of wood veneer (called plies) with adhesive, under heat and pressure. The defining feature is that each layer is laid with its grain running perpendicular to the layer above it, a technique known as cross-grain construction. This cross-lamination is the source of plywood’s exceptional strength, resistance to warping, and dimensional stability.
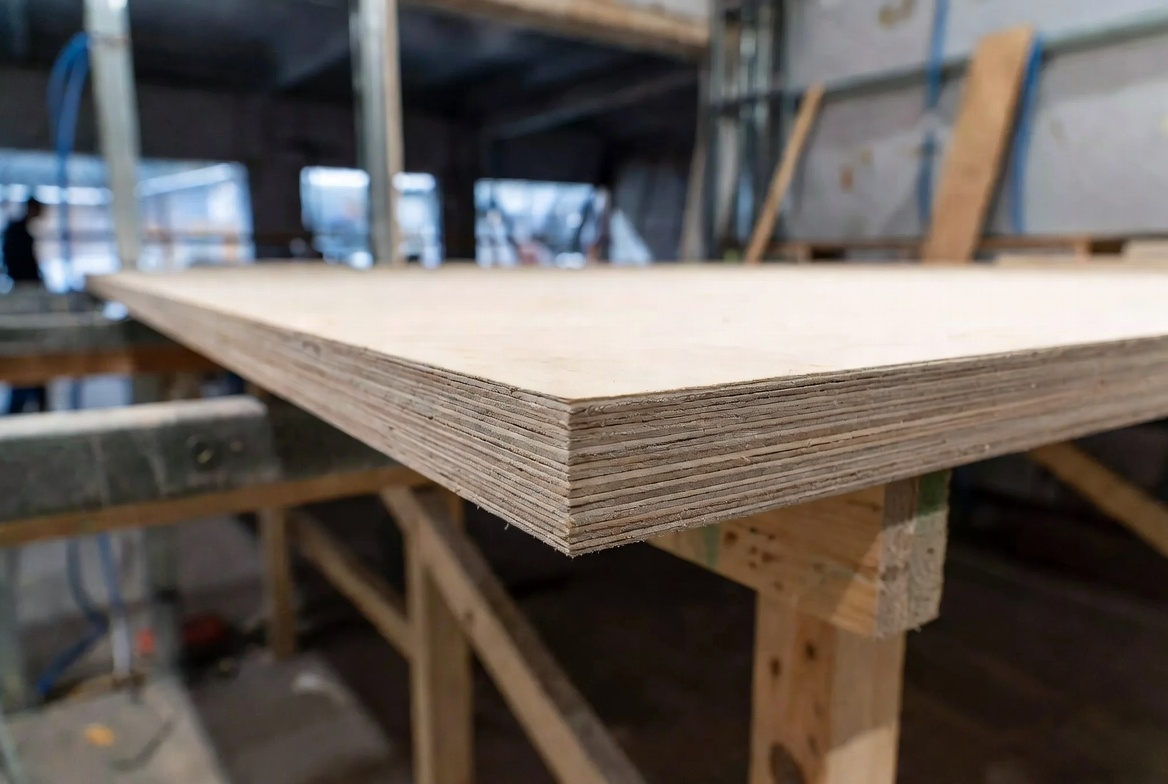
Plywood is available in a wide range of thicknesses, grades, and wood species. Structurally, it outperforms solid wood of equal thickness in many respects, and it is far more resource-efficient to produce.
To learn more about how plywood compares to solid wood alternatives, see our guide on CDX Plywood vs OSB: Key Differences and Best Uses.
What Type of Wood Is Used to Make Plywood?
The species of wood used in plywood production has a direct impact on the final panel’s strength, weight, appearance, workability, and cost. Manufacturers select timber carefully based on the intended application of the finished plywood.
Hardwood Species
Hardwood plywood, used primarily for furniture, cabinetry, and decorative applications, is made from species such as birch, oak, teak, beech, poplar, and eucalyptus. Among these, birch is widely regarded as the benchmark hardwood for plywood production. Its tight grain structure, pale color, and near-perfect consistency make it ideal for high-quality face veneers. Eucalyptus, meanwhile, is popular in markets such as India because of its fast growth rate, high density, and natural resistance to pests.
For more on birch plywood specifically, see our article on Is Plywood Sustainable?, which explores why birch is considered one of the most eco-friendly timber choices.
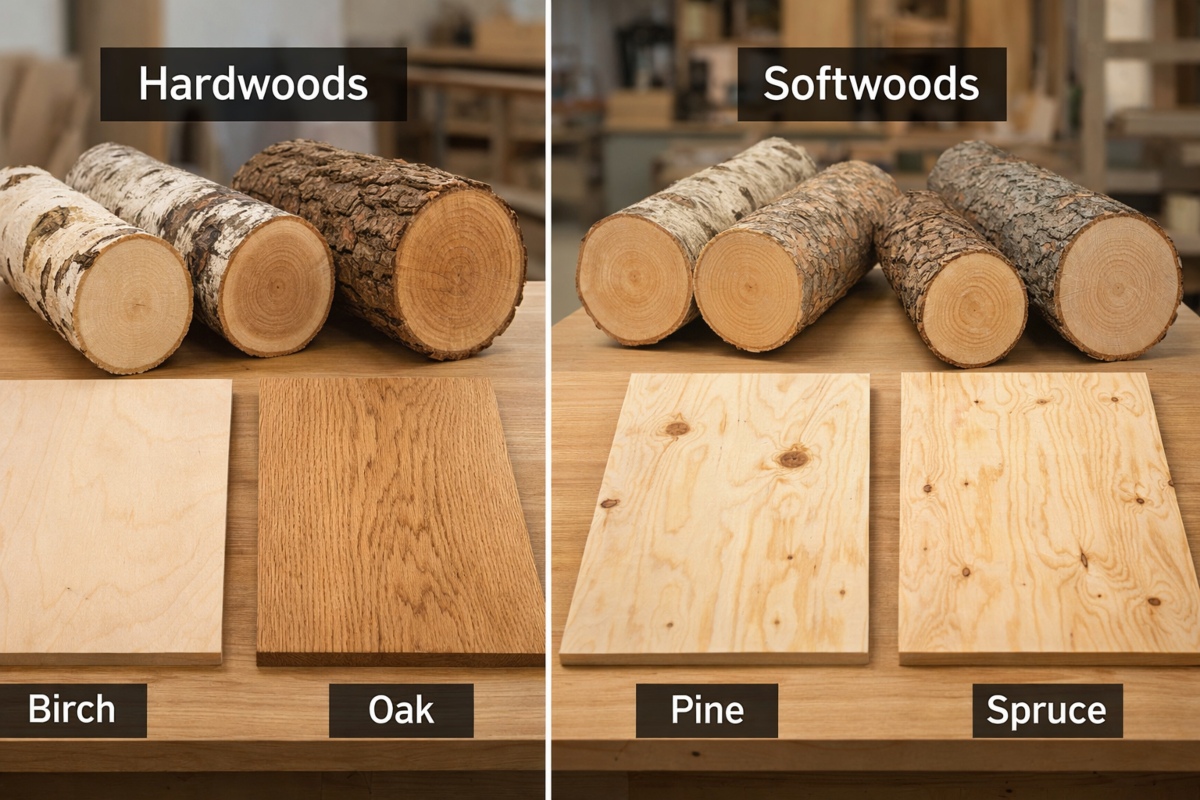
Softwood Species
Softwood plywood, the structural workhorse used in construction, is typically made from pine, spruce, fir, hemlock, and cedar. In the Pacific Northwest of the United States, hemlock and Douglas-fir are the dominant species. Hemlock is particularly valued by veneer mills because it tends to have fewer knots than Douglas-fir, producing a cleaner, more consistent veneer sheet. In India and Southeast Asia, pine-based plywood is common and forms the backbone of the construction-grade market.
The choice between hardwood and softwood plywood is ultimately application-driven. Structural and construction-grade plywood favors softwoods for their availability, speed of growth, and cost-effectiveness. Furniture and interior applications favor hardwoods for their aesthetic qualities and surface characteristics.
| 💡 Did You Know?
At Pacific Veneer Mill in Aberdeen, Washington, around 80–85% of the timber processed is hemlock, chosen specifically for its low knot frequency, which produces higher-quality veneer sheets and a better-value end product. |
The Plywood Making Process: Step-by-Step
The journey from standing timber to finished plywood sheet is a carefully sequenced industrial process involving precision machinery, chemistry, and quality control at every stage. Here is a complete walkthrough of how plywood is made.
Step 1: Timber Selection and Log Preparation
The process begins long before the factory floor. Choosing the right timber is fundamental to the quality of the finished panel. Timber purchasers work with forest managers and logging crews to identify logs that meet the specifications for veneer-grade timber: straight, clean, with minimal knots and defects. Veneer-quality logs command a premium over lower-grade logs destined for pulp mills or pallet production, and selecting them correctly is a skilled, experienced task.
Once the logs arrive at the mill, they undergo an initial preparation sequence:
- Debarking: The outer bark is stripped from each log using mechanical debarkers. This removes bark, mineral deposits, and surface contamination that would damage the veneer-peeling blade.
- Cutting to block length: Logs are cut into uniform block lengths (typically around 100 inches) to match the width of the lathe and the target veneer dimensions.
- Hydrothermal processing: Cut blocks are placed in soaking pools or steam vaults filled with hot water at 40–60°C (or steamed at up to 165°F / 74°C for 16 hours in some mills). This hydrothermal conditioning softens the wood fibers, making the log easier to peel smoothly and reducing the risk of veneer sheet cracking or tearing during the peeling stage.
Step 2: Peeling Logs into Veneers
With the logs prepared and conditioned, they move to the heart of the veneer mill: the rotary lathe. This is where logs are transformed into continuous ribbons of thin wood veneer.
A charger system digitally scans each log block to locate its geometric center (the optimal axis for rotation) and positions it precisely in the lathe. The lathe then spins the log at high speed against a fixed, razor-sharp blade. As the log rotates, the blade peels a continuous sheet of veneer from its surface, much like unrolling a roll of paper.
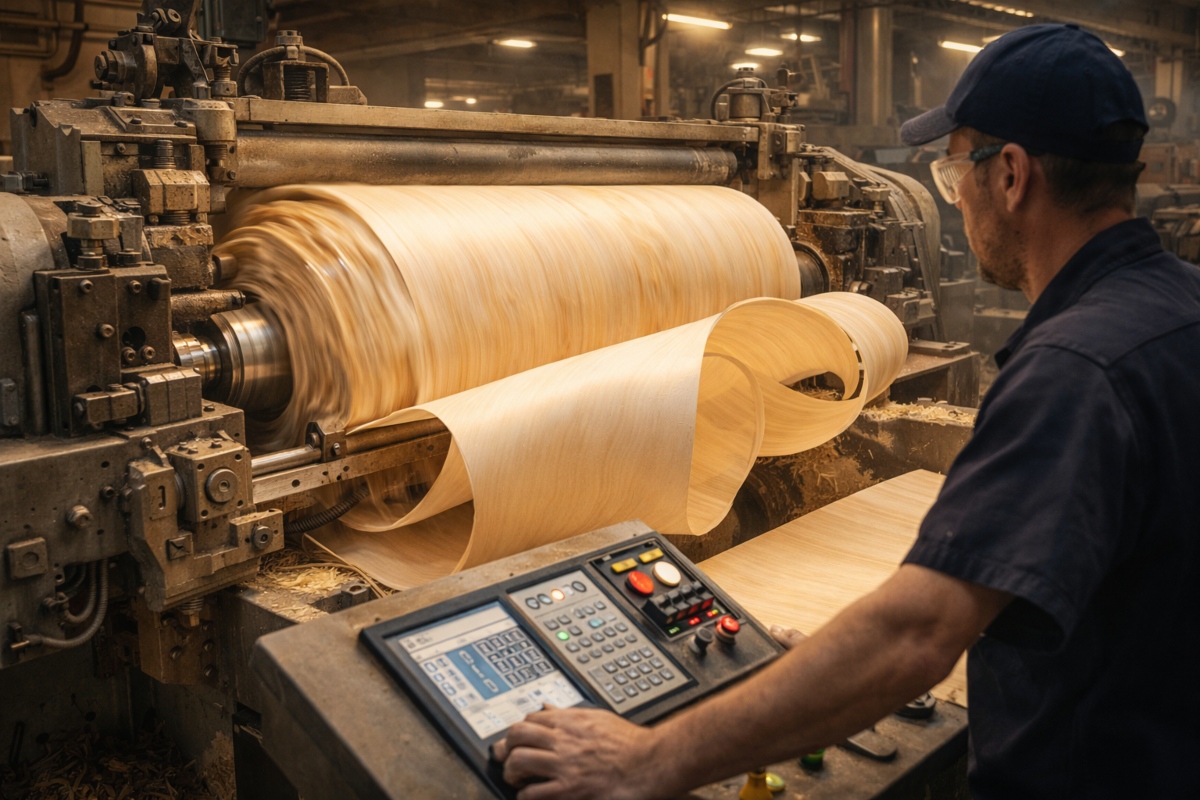
The thickness of the resulting veneer depends on the intended application of the finished plywood, typically ranging from 1.5 mm to 4 mm. Modern lathes can handle log diameters from 7 inches to 27 inches and are capable of peeling up to 14 logs per minute. The lathe blade is replaced with a freshly sharpened one every two to three hours to maintain cutting quality.
Once the log has been fully peeled down to a small central cylinder (called a peeler core , that core is removed and repurposed: sold for fence posts, pallet stock, or landscaping timber. Nothing goes to waste in a well-run plywood facility.
Step 3: Clipping, Scanning and Sorting Veneer Sheets
The continuous veneer ribbon emerging from the lathe is assessed and cut into manageable sheets by an automated clipping system.
A digital scanner runs along the veneer ribbon, assessing it for defects such as knots, holes, splits, and sap inclusions. Based on this analysis, the scanner directs a rotary clipper to cut the ribbon into standard-sized sheets (typically 54-inch and 27-inch widths) while discarding sections with major defects. Defective pieces are routed to a separate pile and used either as plywood filler or chipped for other wood products.
A moisture meter simultaneously scans each sheet to measure its moisture content. Because logs contain 30–120% moisture at this stage, and because sheets with different moisture levels require different drying times, they are sorted into separate stacks (heartwood, sapwood, and super-sapwood) before entering the dryer.
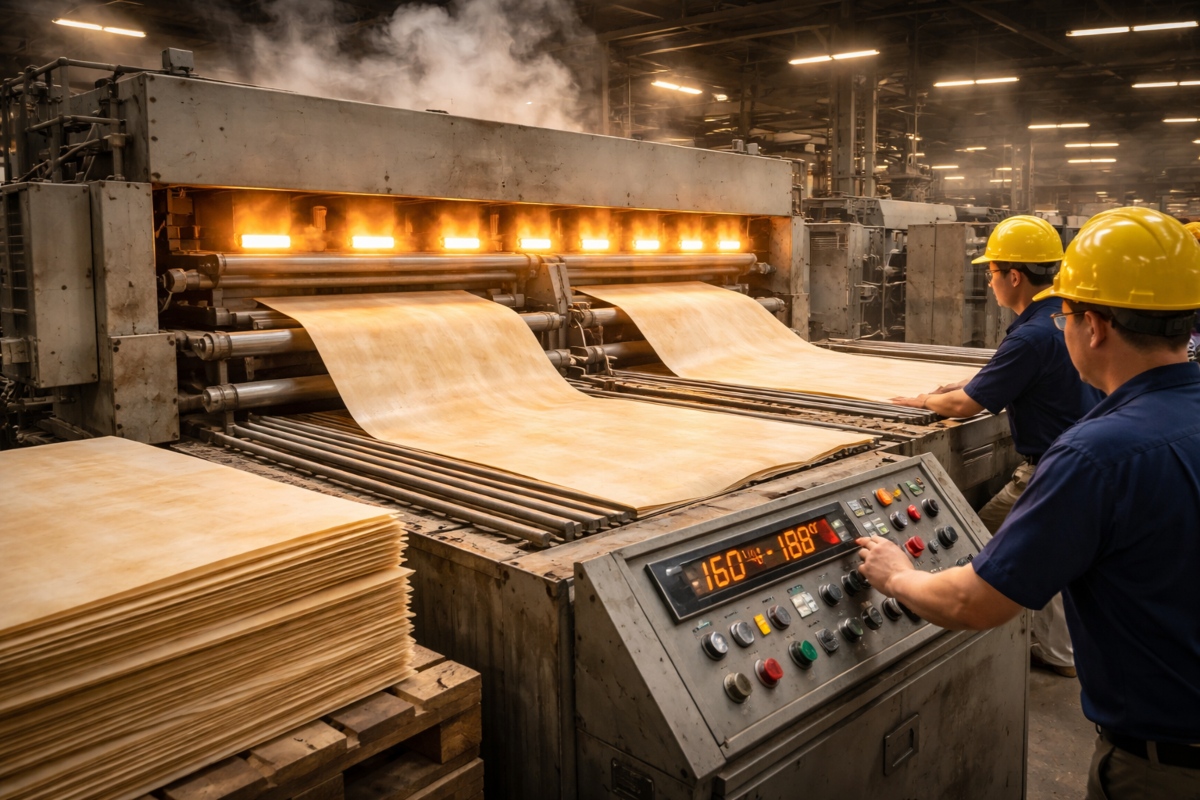
Step 4: Drying the Veneers
Freshly peeled veneer is wet, unstable, and unsuitable for gluing in its current state. Drying is an essential step in the plywood manufacturing process that reduces moisture content to a level where adhesive bonding is effective and the panel will be dimensionally stable in use.
Veneer sheets are fed through large industrial continuous-band dryers or roller dryers, operating at temperatures of 160–180°C. The target moisture content after drying is typically 8–12% , a level at which the wood fibers are stable and the adhesive can form a strong, even bond.
After drying, any surface defects that remain (knots, close shakes, bud traces) are identified by specialist scanning systems and repaired using veneer inserts or patches that match the surrounding wood in color and grain pattern. This defect repair step, sometimes called “surface repairing” or “patching”, ensures the finished plywood panel meets its grade specification.
Some veneer sheets also undergo vacuum pressure treatment (VPT) at this stage, a process in in which preservative chemicals are forced into the wood fibers under pressure, imparting resistance to termites, borers, and fungal decay. This treatment is especially important for plywood destined for use in humid environments or direct ground contact.
| ⚙️ Process Note
The drying stage is one of the most energy-intensive parts of plywood production. Many manufacturers use the bark and wood waste generated earlier in the process as biomass fuel to power the kilns, significantly reducing the energy cost and environmental impact of this step. |
Step 5: Adhesive Application and Layering
With dried, defect-repaired veneers ready, the assembly stage begins. This is where the layered structure that gives plywood its defining properties is built up.
Veneer sheets are selected and arranged based on their grade and size, then fed through an adhesive application system. Adhesive (either applied by roller coater or sprayed as a “glue curtain”) is applied to both faces of every second sheet. The coated sheets are then stacked alternately with uncoated sheets, with each layer’s grain direction rotated 90 degrees relative to the one beneath it.
This cross-grain layering is the engineering principle that makes plywood stronger and more stable than solid wood. It distributes stress evenly across the panel in both directions, preventing splitting along the grain and resisting warping or shrinkage under changing moisture conditions.
The type of adhesive used is critical and determines the plywood’s moisture performance:
| Adhesive Type | Grade | Best For | Moisture Resistance |
| Phenol-Formaldehyde (PF) | BWP / Exterior | Outdoor, structural, marine use | Very High , fully waterproof |
| Urea-Formaldehyde (UF) | MR / Interior | Indoor furniture, cabinetry | Moderate , moisture resistant |
| Melamine-Urea-Formaldehyde | BWR / Boiling Water Resistant | Kitchens, wet areas | High , boiling water resistant |
| Soy-based / Bio adhesives | E0 / Eco | Eco-conscious projects | Moderate , low VOC emissions |
To learn more about how adhesive type affects plywood performance in wet conditions, see our comparison article: CDX Plywood vs OSB: Moisture Resistance Explained.
Step 6: Pre-Pressing and Hot Pressing
The assembled veneer stack (known as the mat) passes through a two-stage pressing operation that bonds all layers together permanently.
Pre-pressing (cold pressing) uses mechanical rollers or a cold press to apply initial pressure across the mat. This step compresses the layers, removes trapped air pockets, ensures even adhesive distribution, and stabilizes the assembly before it enters the main press.
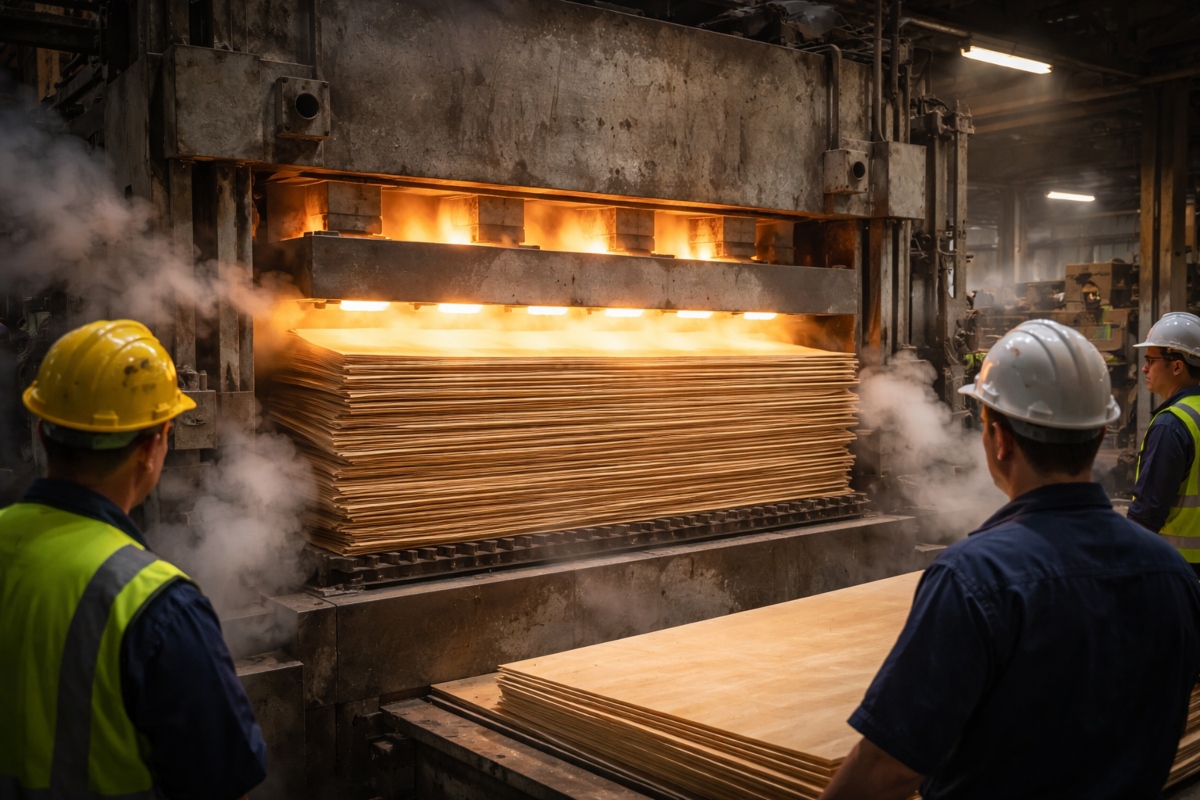
Hot pressing then subjects the pre-pressed mat to high temperature (typically 130–160°C) and high pressure (up to 650–800 PSI) in a multi-platen hydraulic press. The combination of heat and pressure activates the adhesive, forcing it to cure and form a permanent molecular bond between the veneer layers. Hot press cycles typically last 4–8 minutes depending on panel thickness and adhesive type.
After pressing, the panels (now called mat ply) are removed and conditioned at ambient temperature for a period of time to allow residual stresses to equalize. This seasoning step prevents warping and ensures dimensional stability before the finishing operations begin.
| Step 7 | Trimming and Edge Cutting
Fresh from the press, plywood panels have slightly irregular edges and are marginally oversized relative to their final commercial dimensions. Trimming brings the panel to its precise target size. |
Step 7: Trimming and Edge Cutting
Fresh from the press, plywood panels have slightly irregular edges and are marginally oversized relative to their final commercial dimensions. Trimming brings the panel to its precise target size.
Panels pass through an edge-trimming machine or DD Saw, which cuts all four sides to exact dimensions, most commonly the standard 4 ft × 8 ft (1220 mm × 2440 mm) sheet size familiar to builders worldwide. Before the final face veneer is applied, the panel may be trimmed to allow a small margin; final trimming to exact dimensions occurs after face overlaying. Once trimmed, panels are inspected for edge gaps or voids: small openings in the cross-section that can allow moisture and insects to penetrate the panel.
Side gap filling addresses these edge voids using putty-based or resin-based fillers, applied and dried to produce a smooth, sealed edge that is more resistant to moisture ingress and pest infiltration.
Step 8: Face Veneer Overlaying
The face overlaying stage applies the outer decorative or functional veneer layers that give the finished plywood panel its surface appearance and much of its commercial value.
High-quality face veneers (such as gurjan face veneer commonly used in Indian plywood manufacturing) are glued to both sides of the mat ply and pressed again in pre-press and hot press. This additional pressing cycle ensures a strong, delamination-resistant bond between the face veneer and the core.
The face veneer determines the panel’s face grade (A, B, C, or D) and its surface suitability for various applications. A-grade face veneer is smooth, defect-free, and ready for paint, polish, or laminate without further filling. Lower grade faces may have minor permitted defects but are perfectly suitable for structural or concealed applications.
Some plywood panels are also overlaid with a resin-impregnated paper film , producing what is known as film-faced or overlaid plywood. This treatment creates a smooth, hard, moisture-resistant surface particularly suited to concrete formwork, outdoor use, and high-wear applications. For more on specialty plywood types and their applications, see our guide on Is Plywood a Sustainable Material?.
Step 9: Sanding and Surface Finishing
Sanding is the finishing stage that transforms a structurally complete but rough-surfaced panel into the smooth, visually consistent product familiar from hardware stores.
Unlike the calibration step earlier in the process (which uses hard steel rollers to remove major thickness variations from the core), the sanding stage uses wide belt sanding machines fitted with soft rubber rollers and abrasive belts of progressively finer grit, typically 150-grit on the first head, moving to 180-grit or 180–220-grit on subsequent heads. This sequence removes minor imperfections, glue squeeze-out, grain roughness, and any residual surface marks, leaving a surface that is clean, even, and ready for further treatment.
The amount of sanding applied varies by grade: higher-grade plywood receives finer, multi-stage sanding to achieve a near-mirror finish suitable for polishing, painting, or veneering. Lower-grade structural panels receive lighter sanding focused on removing obvious surface defects rather than achieving a fine aesthetic finish.
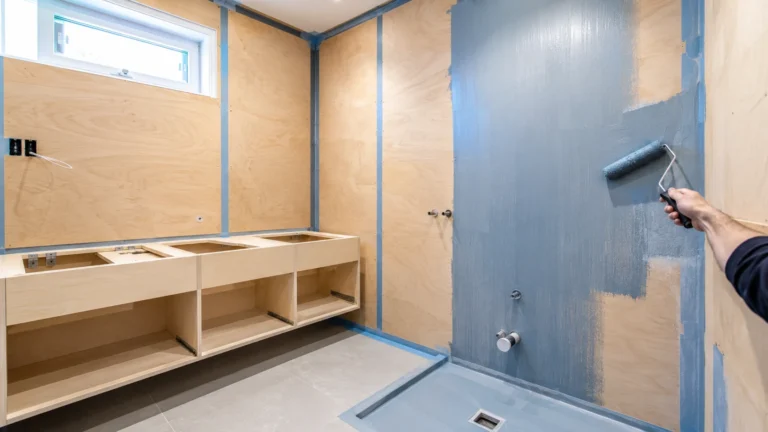
Step 10: Chemical Dipping and Preservation Treatment
To protect plywood against biological threats , termites, wood-boring insects, fungal growth, and moisture-related decay , panels may undergo a chemical preservation treatment before dispatch.
The dipping process involves submerging panels in a large tank filled with a specially formulated chemical solution containing preservatives, anti-termite agents, anti-borer compounds, and antifungal additives. Panels remain immersed for a period ranging from a few minutes to several hours, depending on the required level of protection and the plywood grade. After dipping, panels are removed and thoroughly dried to ensure the chemicals have penetrated and set properly within the wood fibers.
This chemical treatment step is particularly important for plywood destined for use in tropical climates, humid environments, or applications where biological attack is a realistic risk , such as subflooring, exterior sheathing, or furniture in high-humidity areas.
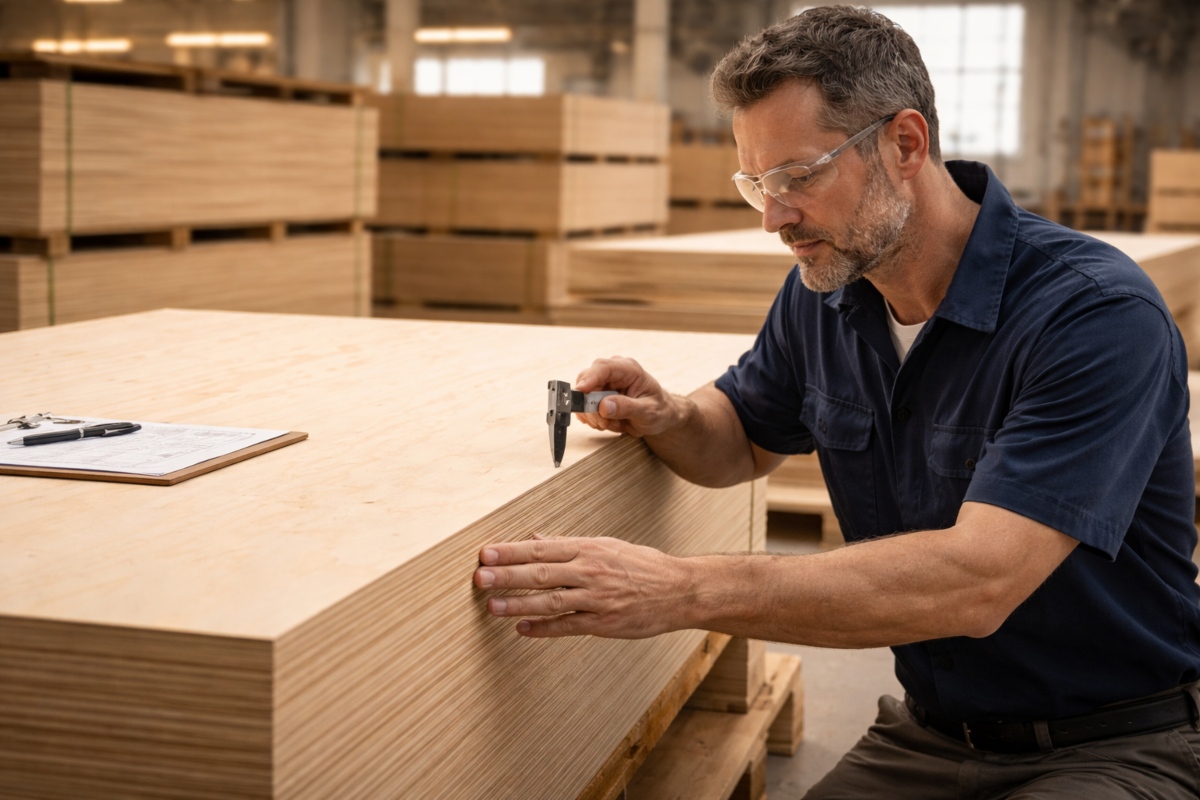
Step 11: Quality Grading and Final Inspection
Before any plywood panel leaves the factory, it must pass a comprehensive quality inspection and grading process. This final stage ensures that every sheet dispatched meets its stated specification.
Quality inspection at this stage is multi-dimensional:
- Surface examination: Each panel is visually inspected for smoothness, surface defects, cracks, overlaps, open gaps, dents, and resin patches. Panels with minor defects are returned for correction , re-sanding, edge filling, or touch-up , before re-inspection.
- Dimensional verification: Panel thickness, flatness, squareness, and edge straightness are measured against specification. Warped or twisted panels that exceed permitted tolerances are rejected or downgraded.
- Bond quality testing: Tapping tests identify internal delamination or weak bond areas that are invisible on the surface. Panels failing bond quality checks are rejected regardless of their surface appearance.
- Grade classification: Panels are assigned face grades (A, B, C, or D) based on surface quality, and bonding grades (MR, BWR, or BWP) based on adhesive specification. ISI markings, batch numbers, and manufacturer details are stamped on each panel before it is packed and dispatched.
| ✅ Quality Standard
Only defect-free panels that pass all dimensional, structural, and surface quality checks are dispatched at their stated grade. Panels with minor issues are downgraded rather than rejected outright, ensuring maximum material yield from each production run. |
Zero Waste: What Happens to Plywood Manufacturing By-Products?
One of plywood’s genuine sustainability credentials is the efficient use of raw material throughout the production process. Very little is wasted:
- Bark and outer log material: Used as biomass fuel to heat the steam vaults and power the industrial dryers , effectively making the drying stage self-fueling.
- Peeler cores: The small cylinders of wood remaining after each log is fully peeled are sold for use as fence posts, pallet stock, or landscaping timber.
- Veneer offcuts and defective pieces: Used as plywood filler in the core layers, or chipped and sold for use in particleboard production, animal bedding, or biomass energy.
- Sawdust and sanding dust: Collected and used as fuel or sold to particleboard manufacturers.
This near-zero-waste approach is one of the reasons plywood consistently performs well in lifecycle sustainability assessments. For a deeper exploration of this topic, see our article: Is Plywood Sustainable? The Complete Environmental Guide.
Plywood Making Process in India: Key Distinctions
India is one of the world’s largest plywood producers, with hundreds of manufacturers ranging from small regional operations to large integrated plants. The core plywood making process in India follows the same fundamental sequence described above, but several local characteristics distinguish Indian production:
- Eucalyptus dominance: Indian manufacturers rely heavily on plantation-grown eucalyptus as the primary timber species , prized for its fast growth rate, high density, and natural resistance to pests. Leading manufacturers such as Royale Touche use 100% eucalyptus core veneers.
- Face veneer specification: Gurjan (Dipterocarpus spp.) is the traditional premium face veneer species in the Indian market, valued for its smooth surface and workability. However, alternative face species including hardwood imports are increasingly used as gurjan supply tightens.
- IS certification: Indian plywood is graded and certified under the Bureau of Indian Standards (BIS) IS:303 standard for commercial plywood and IS:710 for marine plywood. ISI marking on panels provides assurance that the product meets national quality benchmarks.
- Bonding grades: The Indian market commonly refers to plywood grades as MR (Moisture Resistant), BWR (Boiling Water Resistant), and BWP (Boiling Waterproof / Marine Grade) , a classification system that maps to the adhesive type used and the panel’s suitability for different moisture environments.
Plywood Manufacturing Process: Summary at a Glance
| Stage | Process | Key Outcome |
| 1 | Timber selection & log preparation | Right species, debarking, cutting, steaming |
| 2 | Veneer peeling (rotary lathe) | Continuous thin veneer ribbons |
| 3 | Clipping, scanning & sorting | Uniform sheets, defects removed, moisture sorted |
| 4 | Drying | 8–12% moisture content, stable veneers |
| 5 | Adhesive application & layering | Cross-grained mat assembly |
| 6 | Pre-pressing & hot pressing | Permanently bonded panel |
| 7 | Trimming & edge cutting | Precise commercial dimensions, sealed edges |
| 8 | Face veneer overlaying | Surface grade and aesthetic finish |
| 9 | Sanding | Smooth, even, application-ready surface |
| 10 | Chemical dipping | Termite, borer and fungal protection |
| 11 | Quality grading & inspection | Graded, stamped, dispatch-ready panels |
Frequently Asked Questions About the Plywood Making Process
How long does it take to make a sheet of plywood?
The total production time for a plywood sheet varies by plant scale and product type, but a typical hot press cycle runs 4–8 minutes. When the full sequence , log conditioning, peeling, drying, assembly, pressing, and finishing , is considered, the process from raw log to finished panel takes between one and three days in a continuous industrial production environment.
How many plies does plywood have?
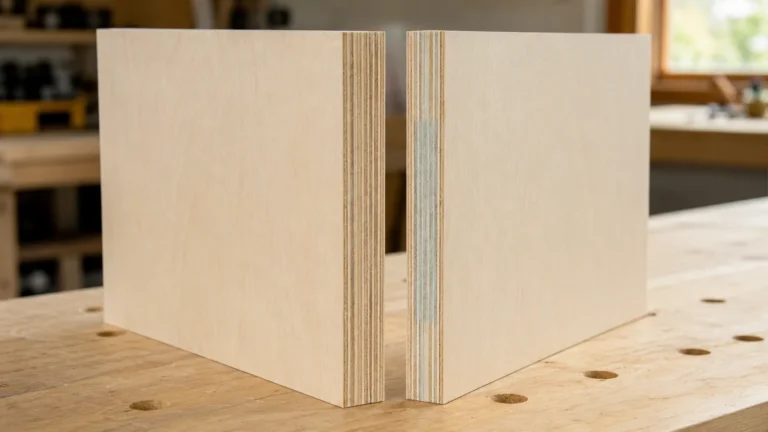
The number of plies varies with panel thickness and intended use. Thin plywood (3–4 mm) may have just three plies, while structural plywood (18–25 mm) may have nine or more. The total number is always odd , this symmetrical construction keeps the panel balanced and minimizes the tendency to warp.
What is the difference between MR, BWR, and BWP plywood?
These bonding grade classifications describe the moisture resistance of the adhesive used: MR (Moisture Resistant) uses urea-formaldehyde glue and is suitable for interior, low-humidity environments. BWR (Boiling Water Resistant) uses melamine-urea-formaldehyde and can withstand intermittent water exposure. BWP (Boiling Waterproof / Marine Grade) uses phenol-formaldehyde and provides the highest moisture resistance, suitable for fully exterior or marine applications. See our article on CDX Plywood vs OSB for a practical comparison of how adhesive type affects performance in real-world conditions.
Can plywood be made at home or in a small workshop?
In theory, small-scale plywood production is possible using manual or semi-industrial veneer peeling equipment, hand-applied adhesive, and hydraulic or mechanical presses. In practice, achieving the consistency, bonding quality, and dimensional precision of factory-produced plywood requires substantial equipment investment. Most small-scale woodworkers work with commercial plywood rather than attempting to manufacture it.
Is plywood from certified forests different in quality?
FSC or PEFC certified plywood is not inherently stronger or better in quality than uncertified plywood , certification attests to the sourcing and forest management practices, not to the panel’s structural properties. However, choosing certified plywood gives buyers confidence that the timber was harvested responsibly and that the product supports sustainable forest management. For more on certification and environmental impact, see: Is Plywood Sustainable?.
Conclusion
The plywood making process is a marvel of industrial engineering , a carefully orchestrated sequence of precision steps that transforms a raw log into one of construction’s most dependable and versatile materials. From the careful selection of veneer-quality timber and the hydrothermal conditioning of logs, through the precision of rotary lathe peeling, the discipline of controlled drying, the chemistry of adhesive layering, and the brute force of hydraulic hot pressing, every stage contributes directly to the quality, strength, and durability of the finished panel.
Understanding this process empowers smarter purchasing decisions. When you know that BWP-grade plywood uses phenol-formaldehyde adhesive cured under 800 PSI at 160°C, you understand why it performs differently in wet conditions than MR-grade interior plywood. When you know that veneer sheets are sorted by moisture content before drying, you appreciate why quality plywood has consistent thickness from one end of the sheet to the other. And when you know that a well-run plywood factory wastes almost nothing , bark becomes boiler fuel, peeler cores become fence posts, and offcuts become particleboard , you can begin to see why plywood consistently ranks among the more sustainable structural materials available.
Whether you are selecting panels for a construction project, evaluating a plywood supplier, or simply curious about the engineering behind an everyday material, we hope this guide has given you a thorough and useful foundation. For further reading, explore our related articles on CDX Plywood vs OSB and Is Plywood a Sustainable Material?.

Bình luận